 wp-gloriouslygoodfoodcom
This is a very quick ‘cheat’ recipe for a custard “doughnut” (or French Toast extraordinaire!) I came up with as …
Festive / Party / Snacks
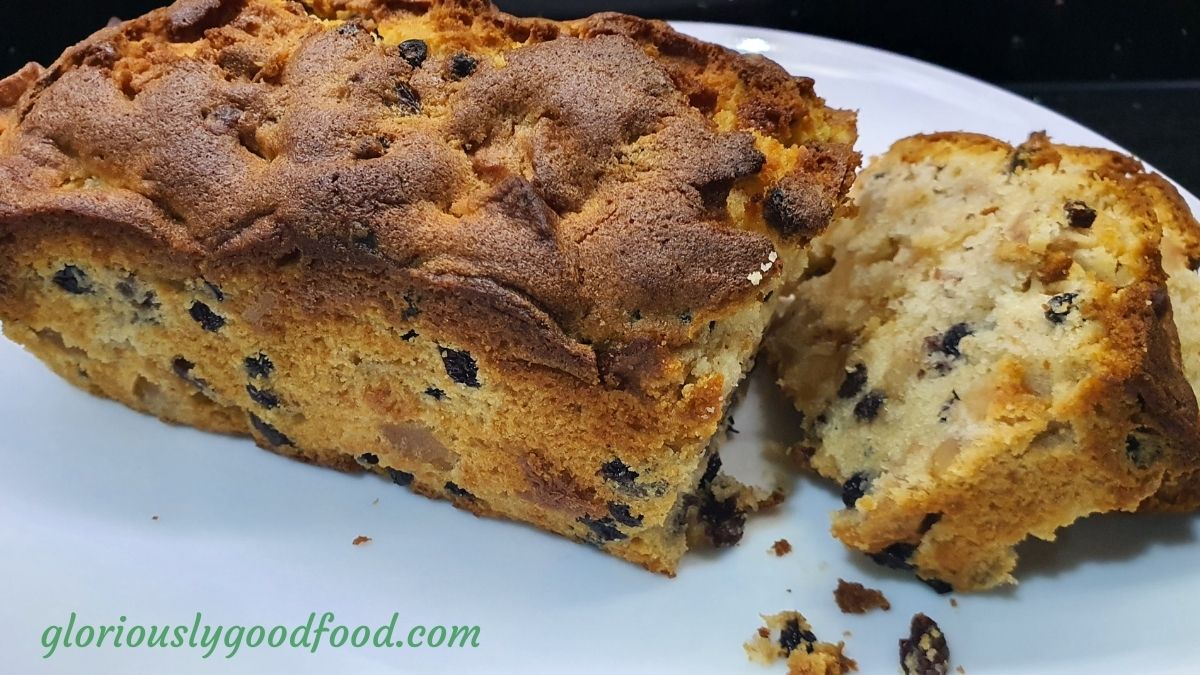
Boozy Fruit Cake | Gin-infused fruit cake
This cake came about as a flash of inspiration after I’d made some festive gin liqueurs and didn’t want to …
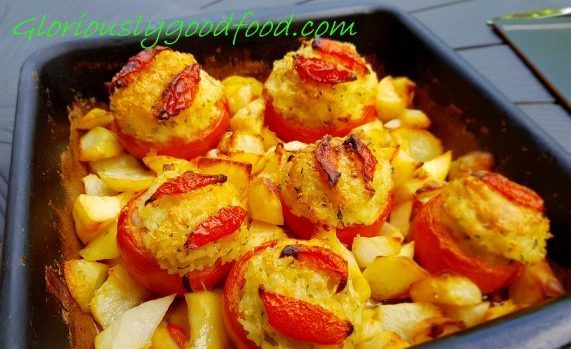
Rice-stuffed tomatoes with potatoes | Pomodori ripieni al riso con patate
This recipe for rice-stuffed tomatoes was originally my Nonna Wanda’s recipe, with the addition of potatoes made by my Zia …
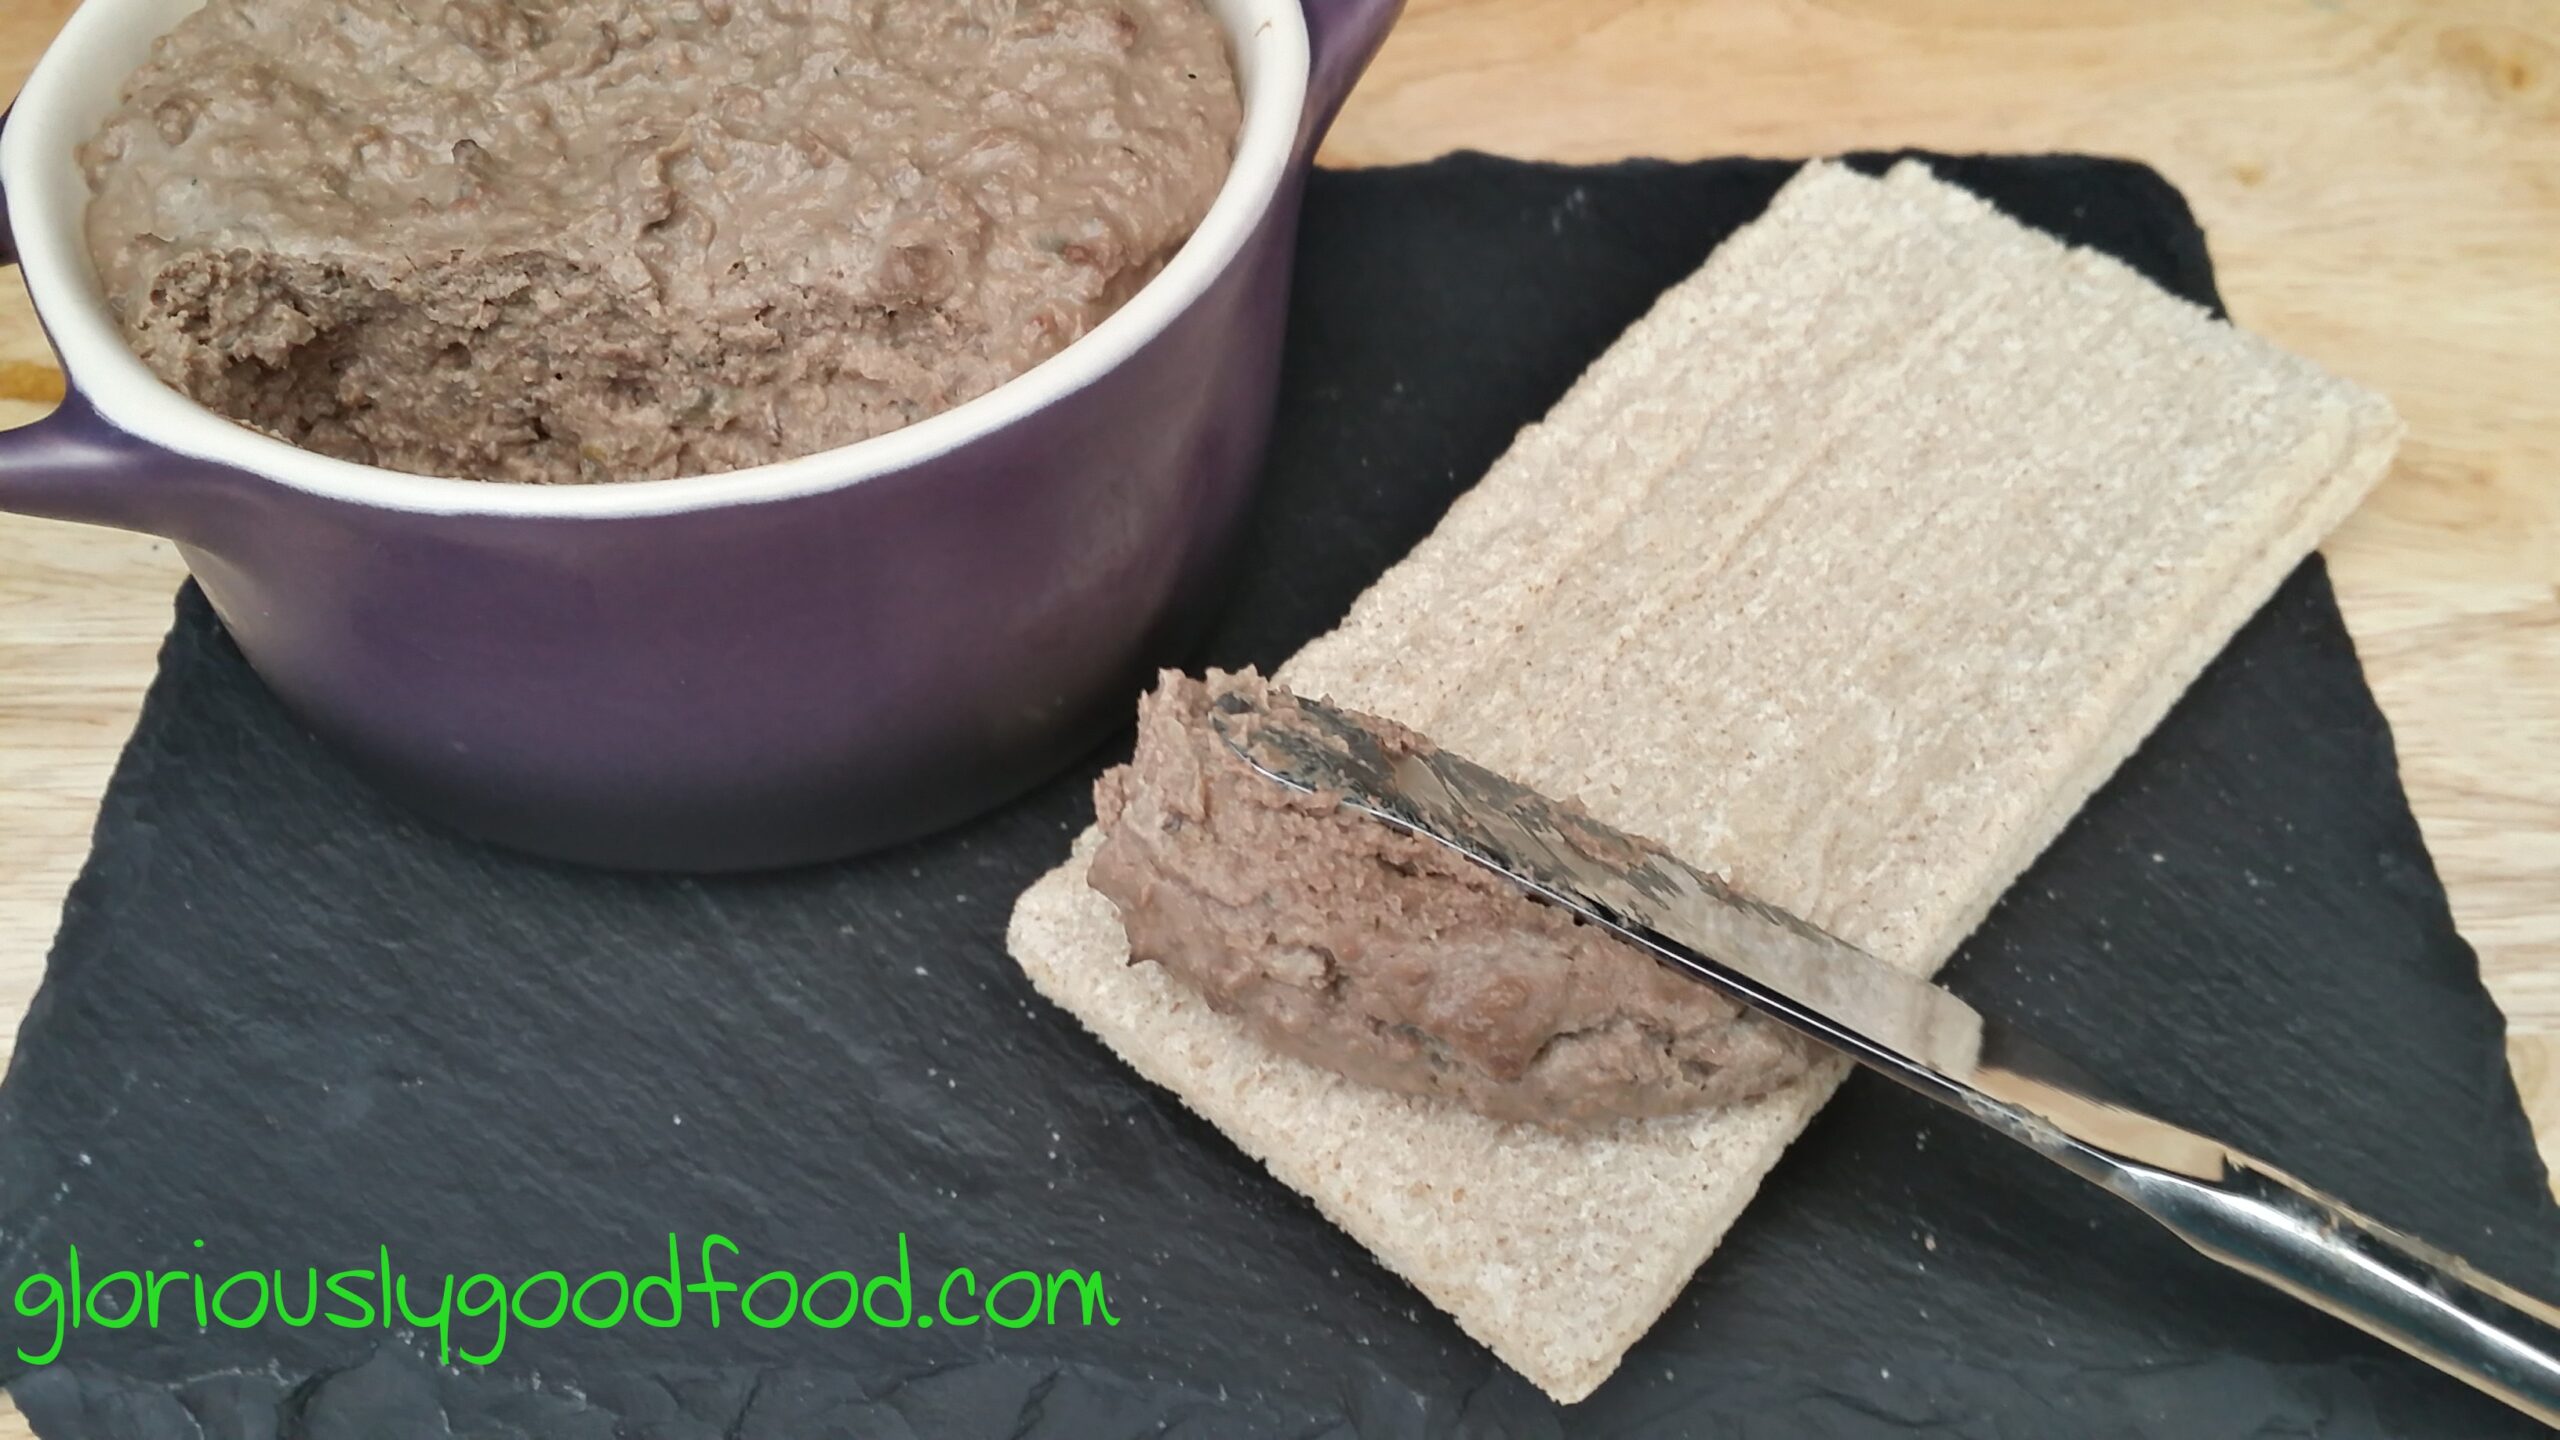
Chicken Liver Pâté | Low Fat Recipe | Suitable for Reflux
I love chicken liver pâté! I used to make it with tons of butter (including a thick butter ‘crust’) and port… …
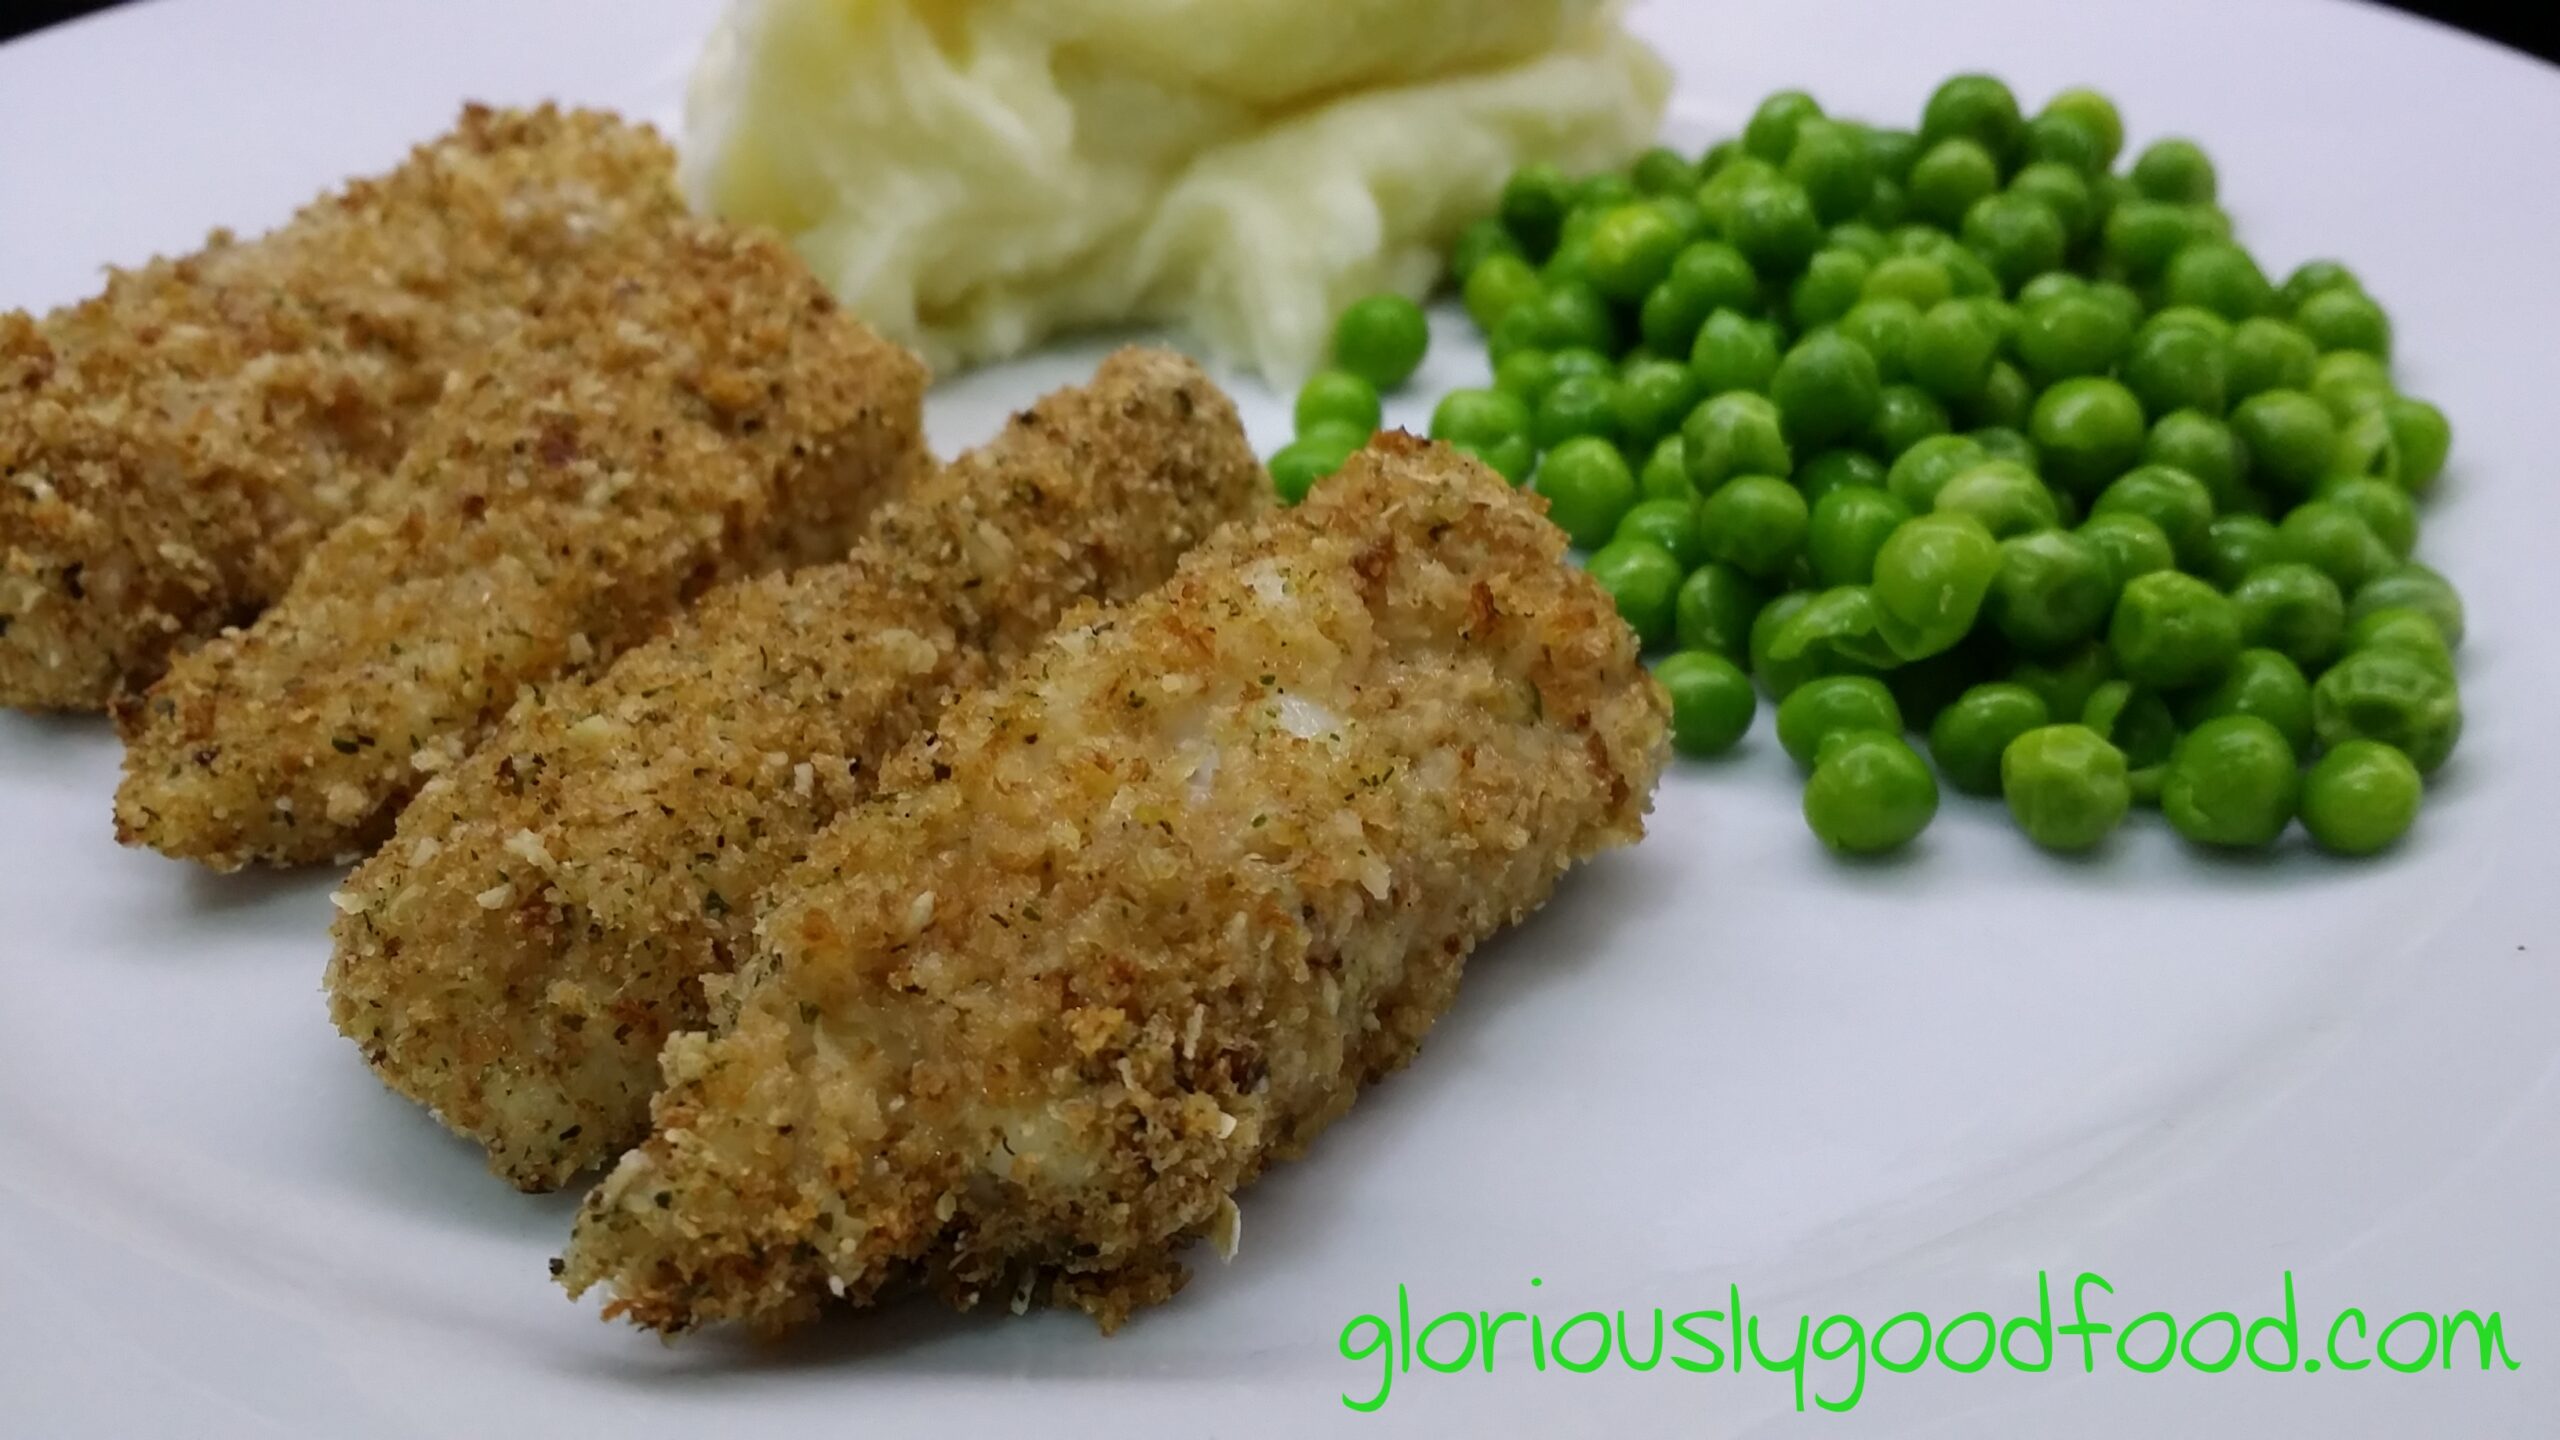
Baked Fish Fingers | Low-Fat Fish Fingers | Reflux Recipe
This is a really quick and simple way to make healthy, low-fat and reflux-friendly* fish fingers This recipe makes approximately …
Low Fat Lemon Sponge Cake with Lemon Icing | Low Fat Recipe | Reflux Recipe
Low-fat, reflux-friendly (we only use lemon rind, not juice, so there is no acid to worry about) lemon cake with lemon icing. Scrumptious!
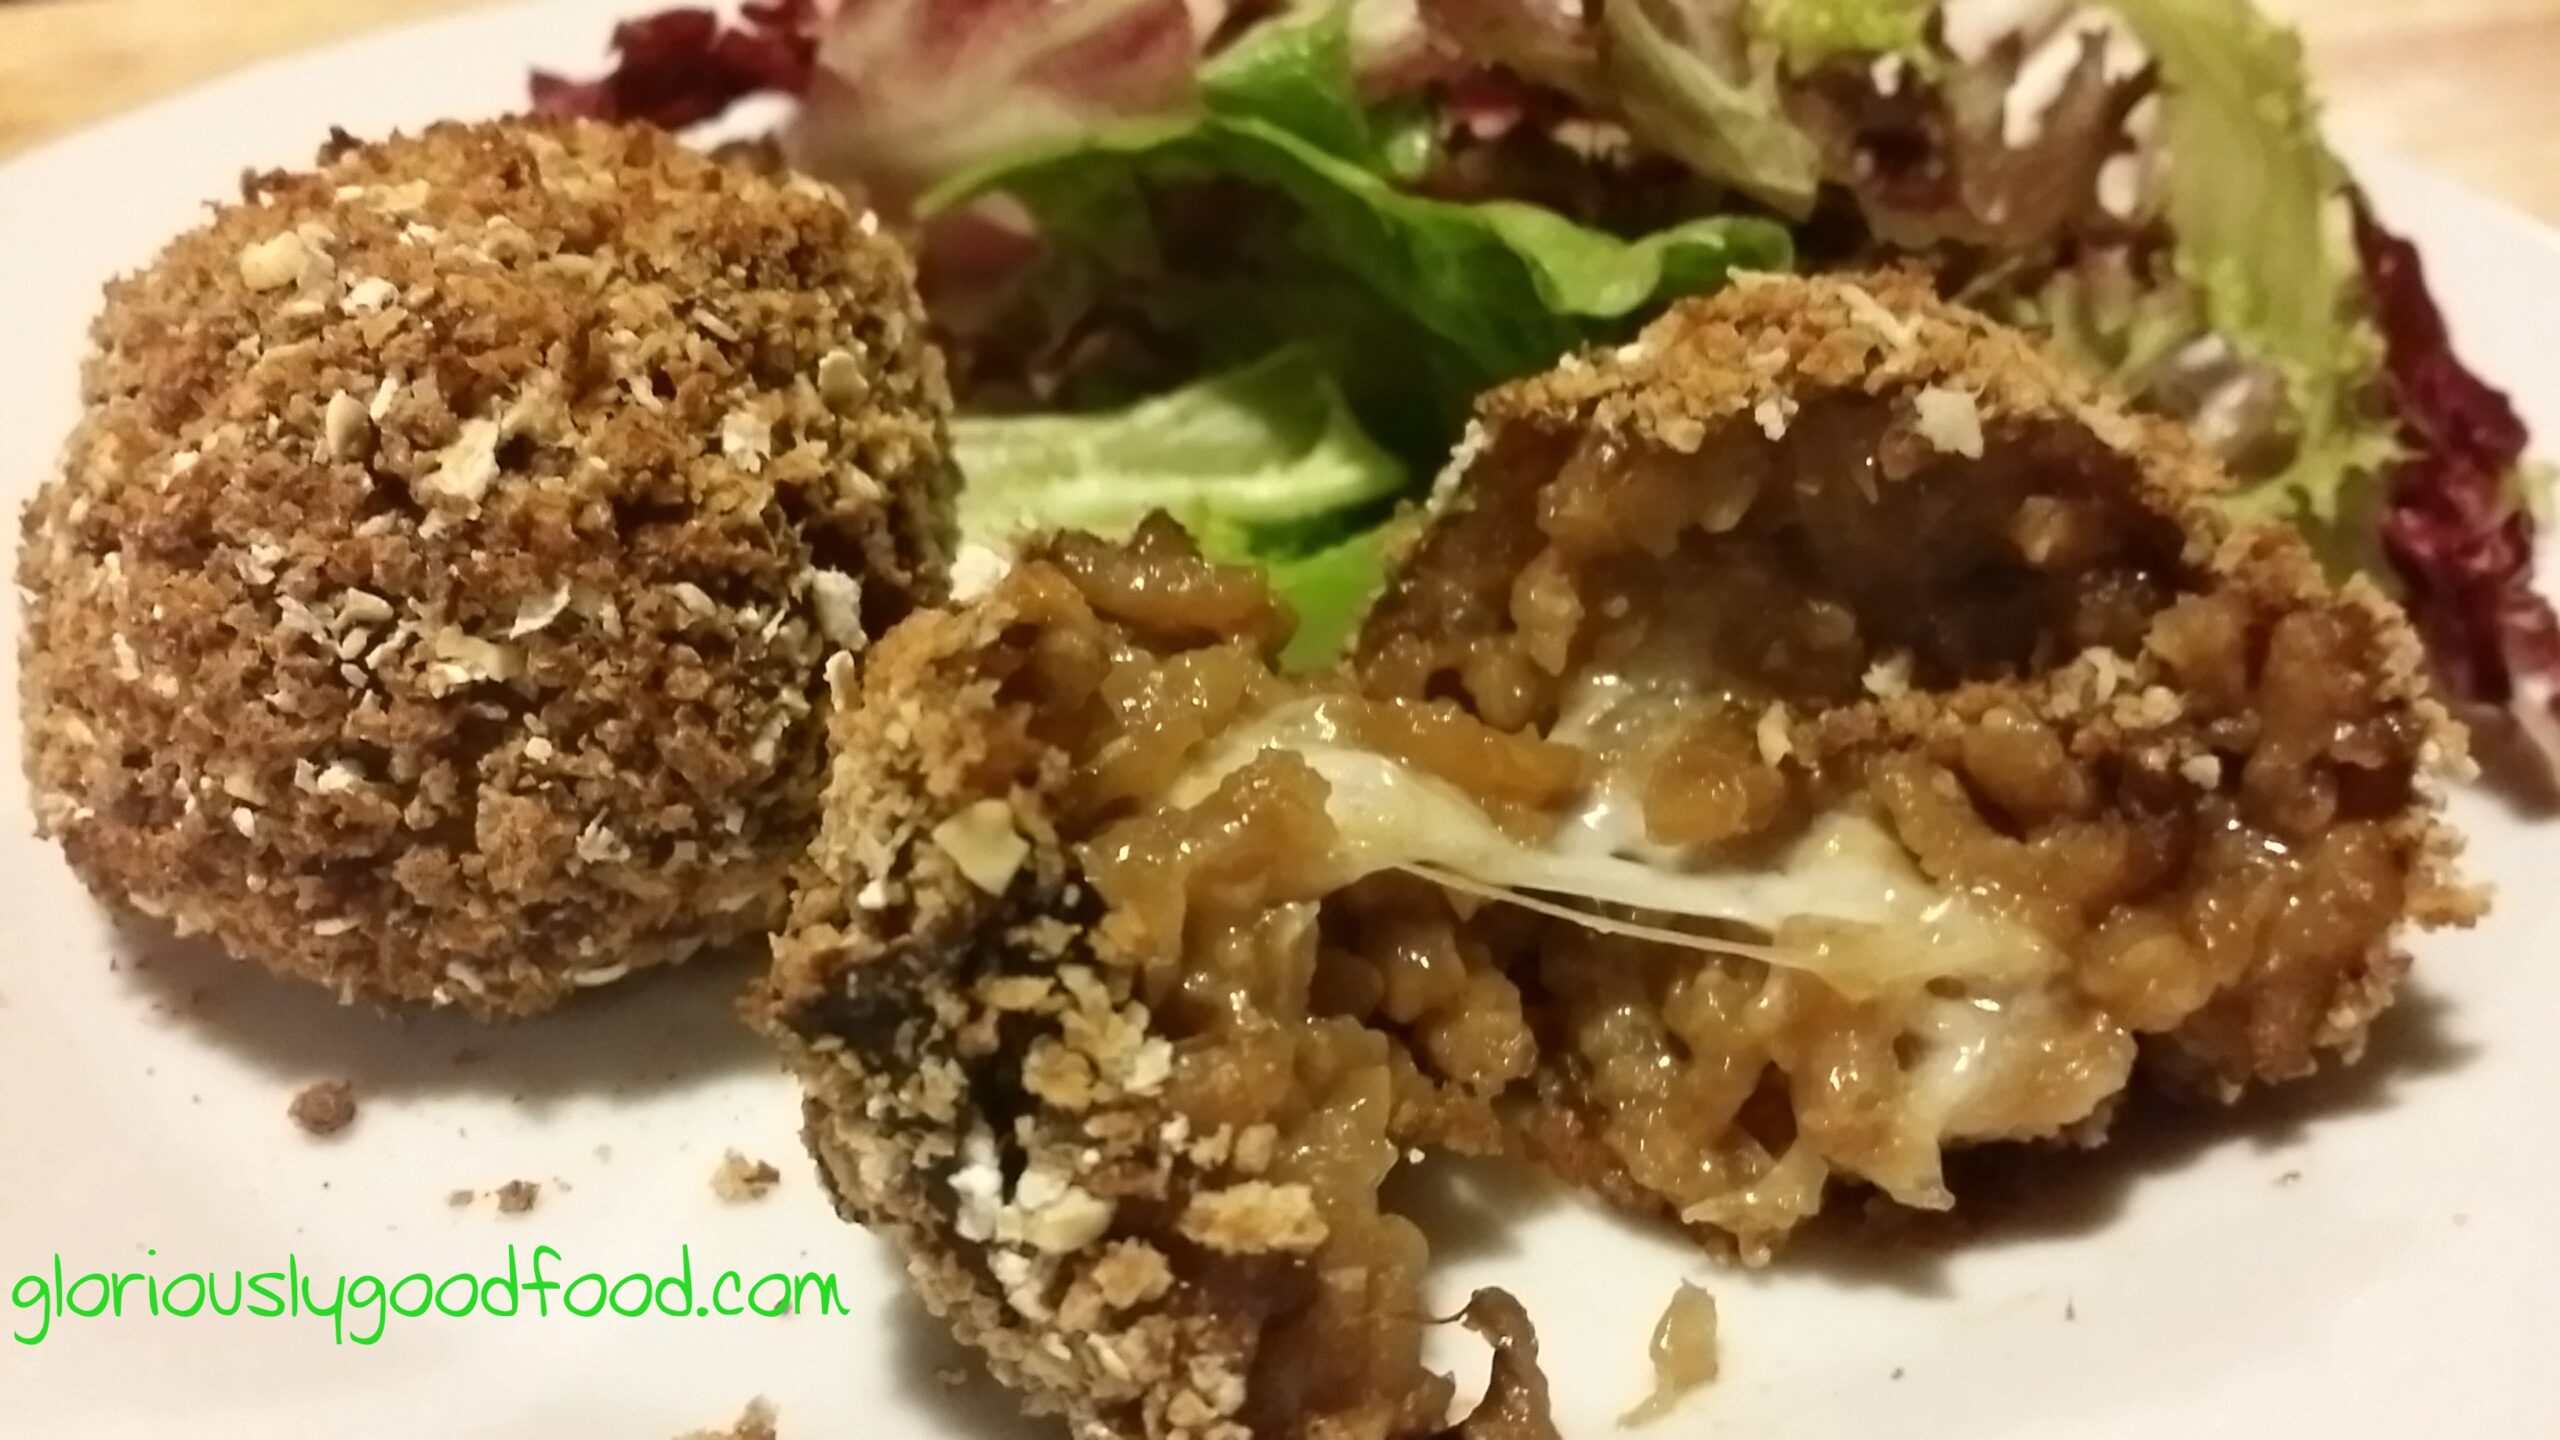
Low-Fat Arancini | Porcini Mushroom and Mozzarella Arancini | Risotto Balls
This is a recipe to turn a low-fat porcini mushroom risotto into low-fat, reflux-friendly baked arancini
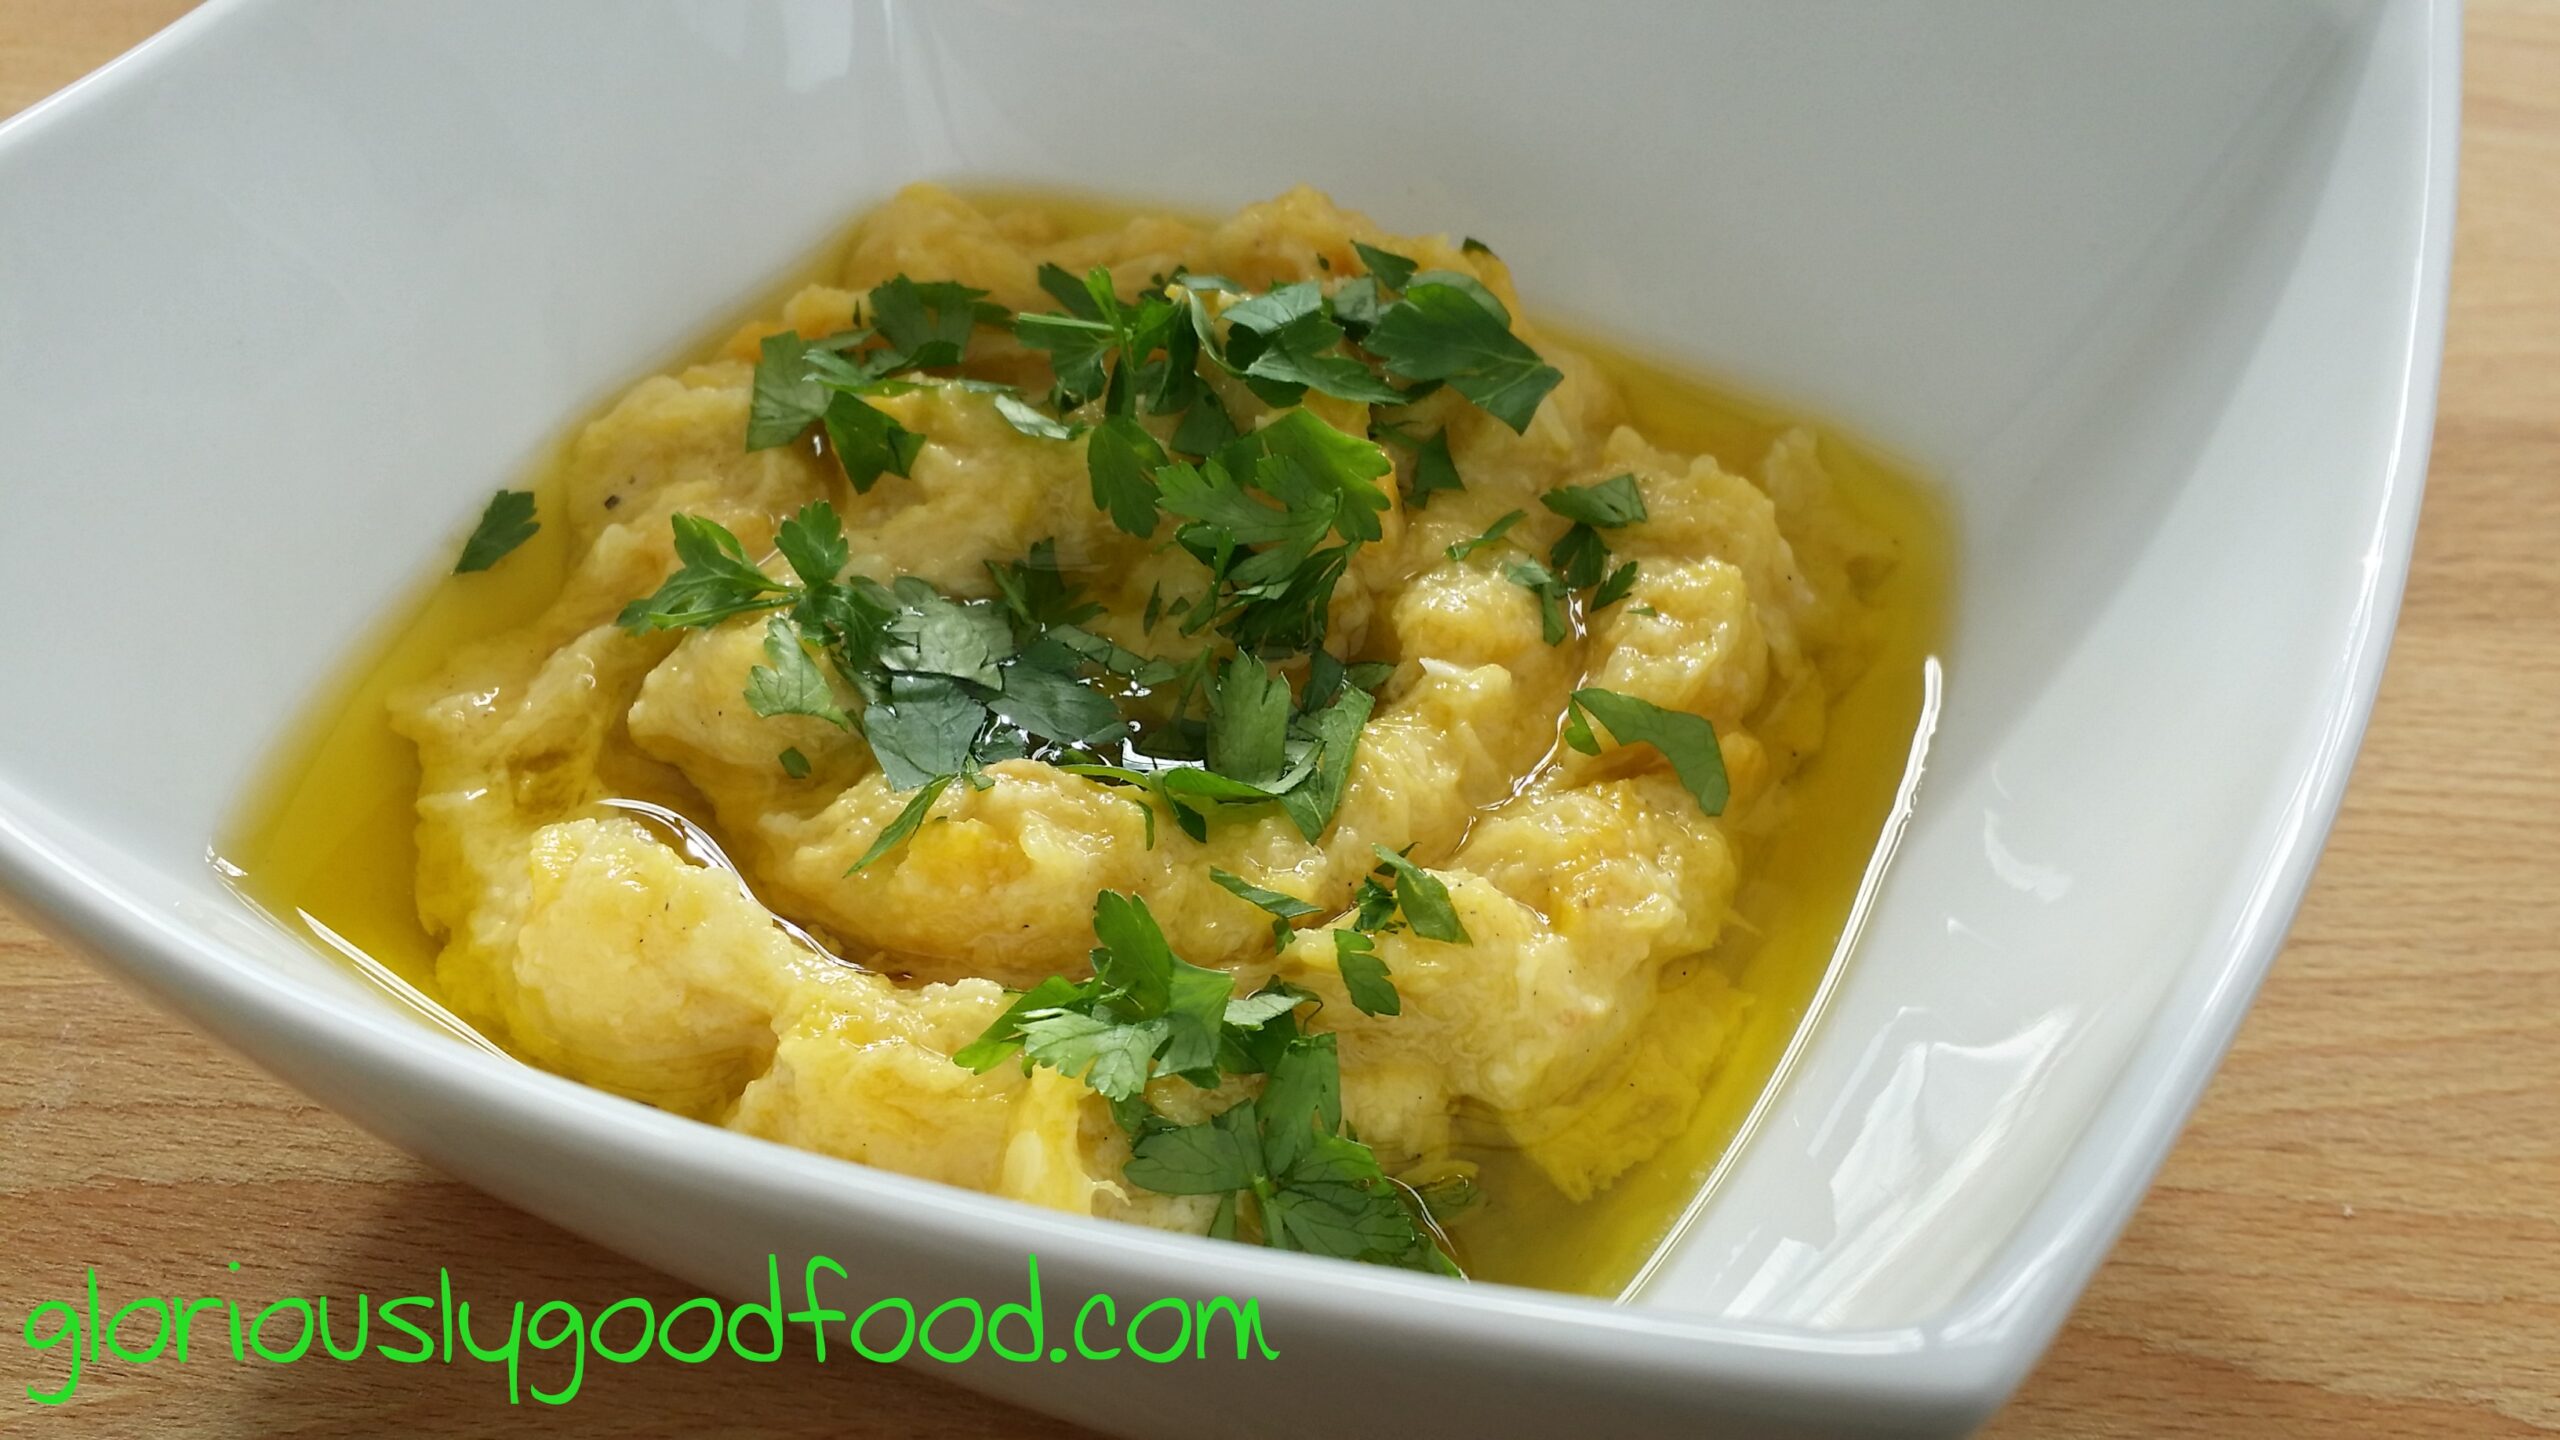
Marrow Dip | Vegetable Marrow
This (vegetable) marrow dip is very similar to Baba Ganoush, but uses marrow instead of aubergine (eggplant).
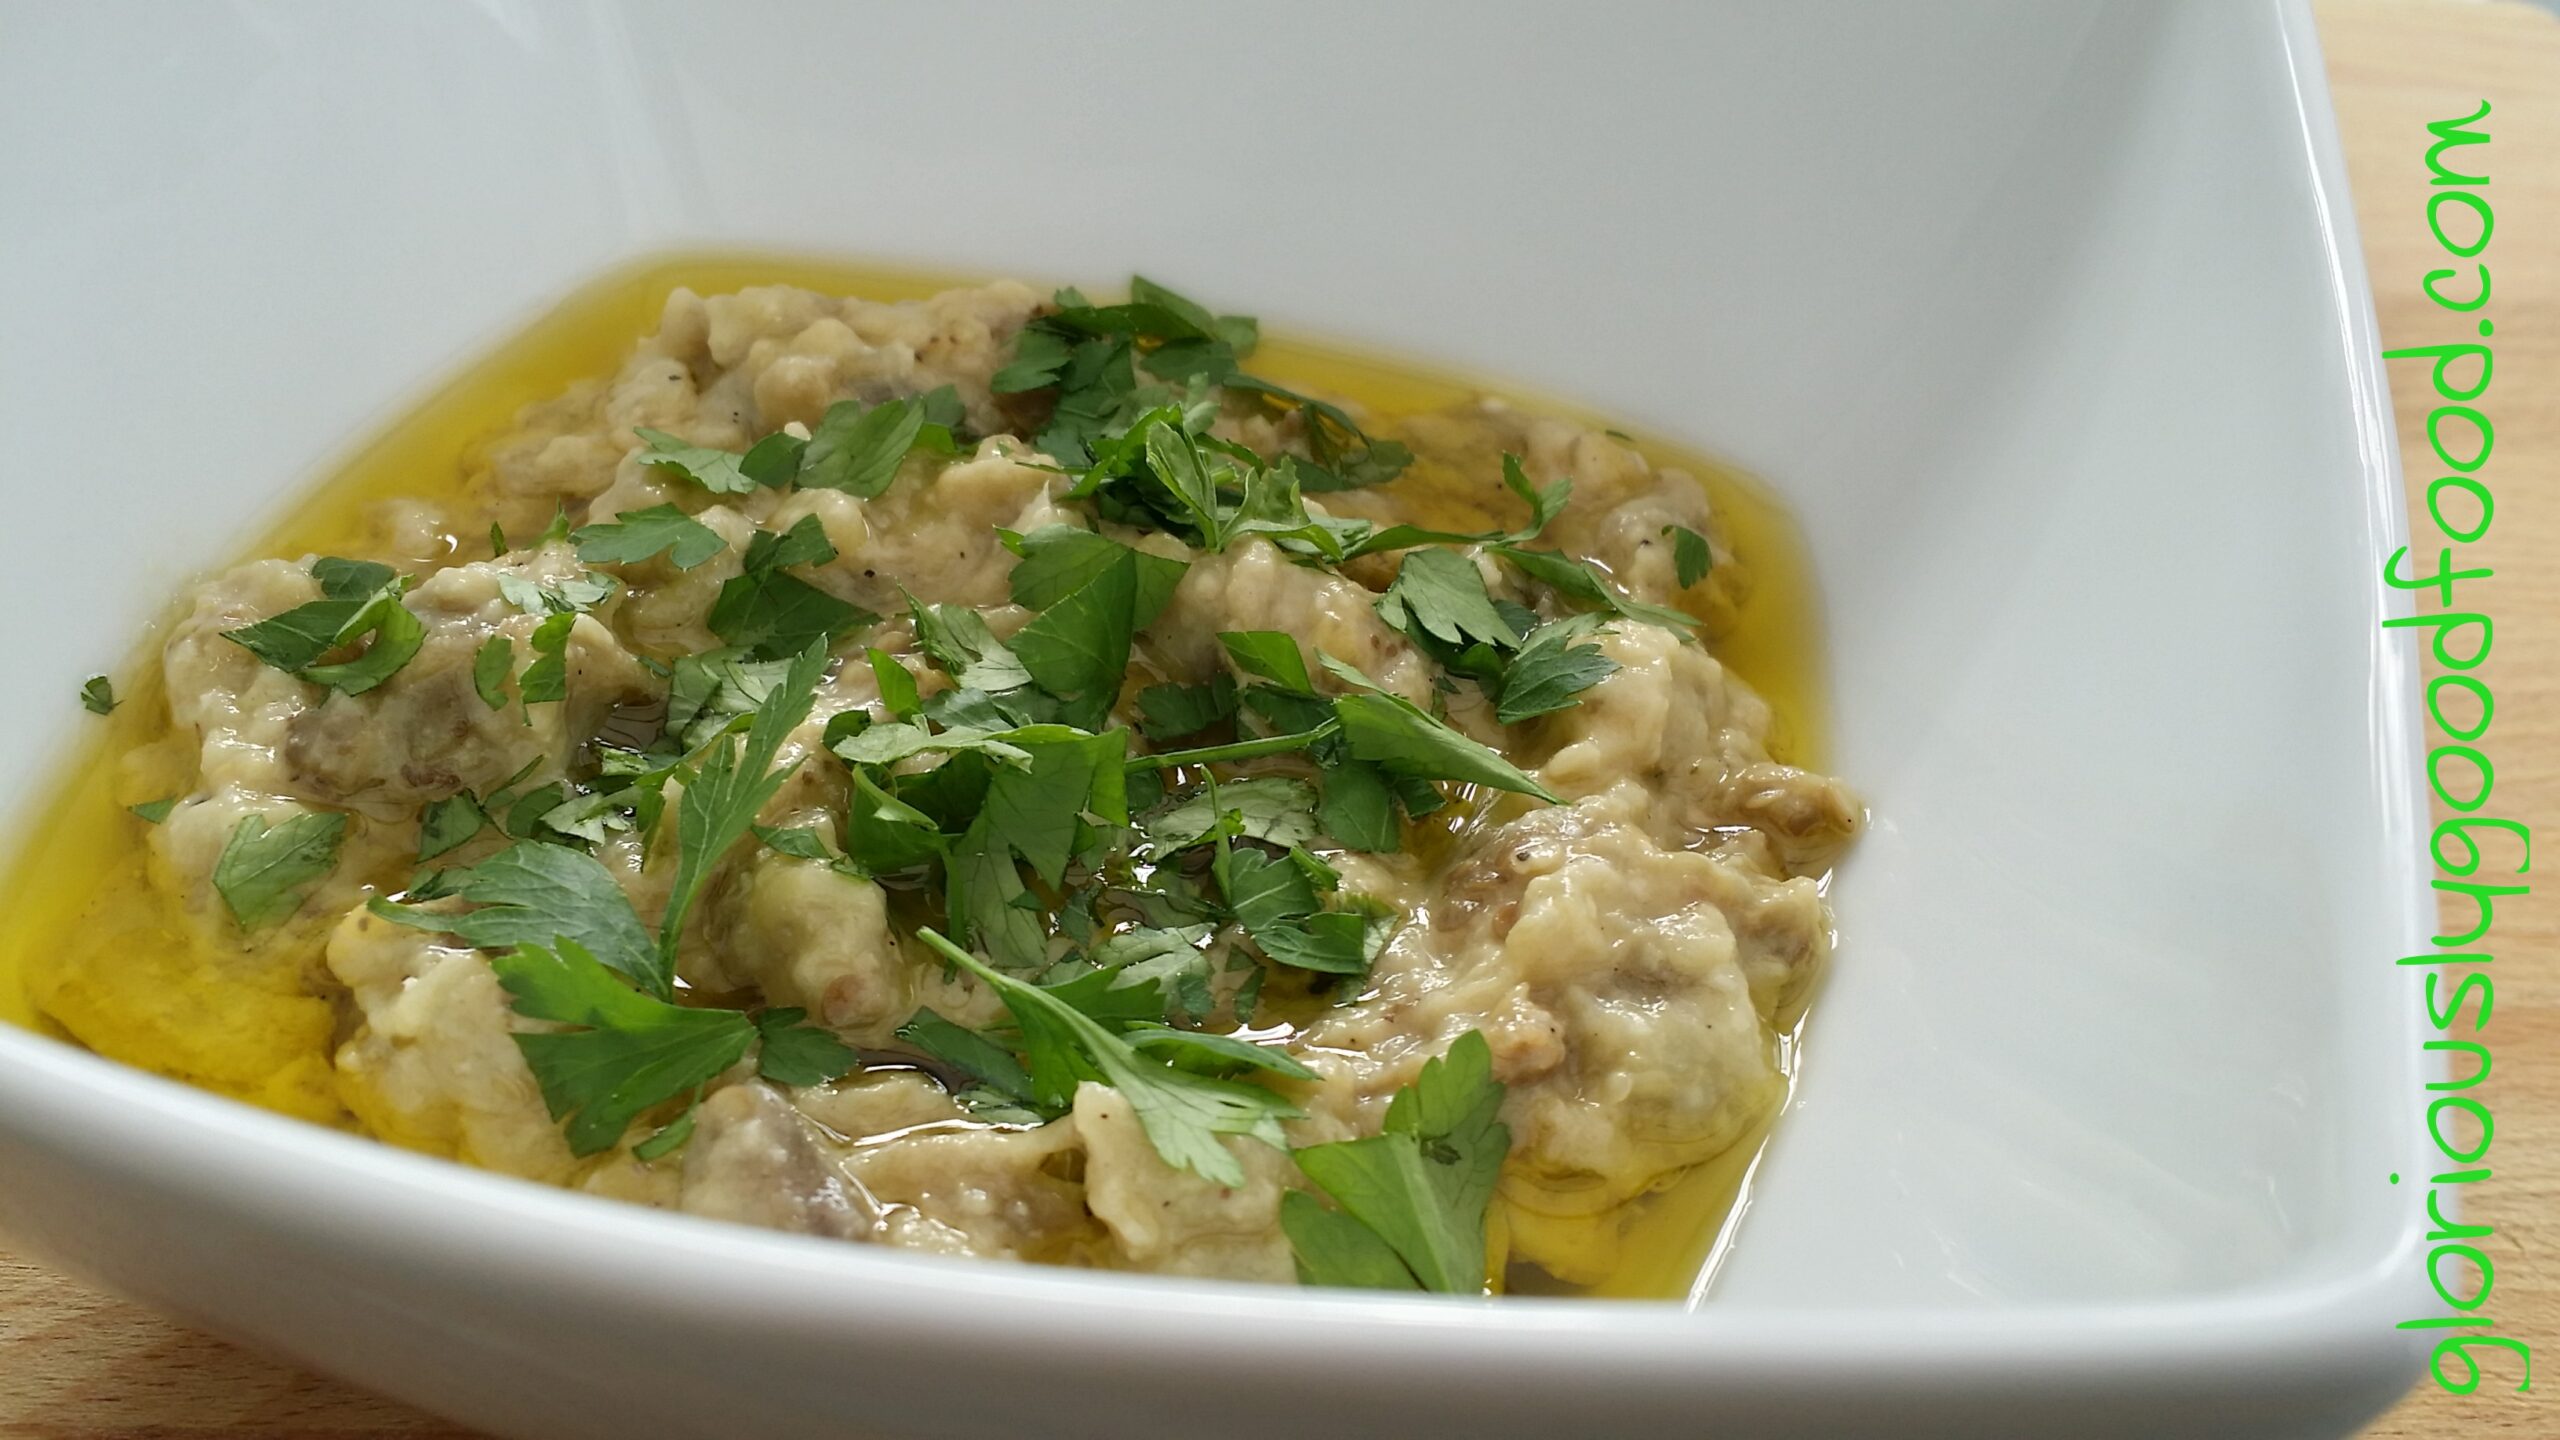
Baba Ganoush | Aubergine Dip
This is my version of the delicious Eastern European dish, Baba Ganoush. Enjoy! 🙂
Tortilla Garlic Bread | Quick Garlic Bread
Ultra-thin and quick garlic bread recipe This is a very quick and simple recipe so you can have a tasty …